Monday, July 30, 2012

Replacing my rear brake pads on my Katana. (Don't tell my wife I used the sink)

Well first off, this wasn't supposed to take as long as it did.   My rear brakes had been out for a while now, as they were very very noisy, so basically I just trained myself to never use my rear brakes and only downshift, and us my front brakes.

I first watched a YouTube video once again about how to replace my rear brake pads.  So i got to work and started to it. 

But yes, my whole motorcycle is just a work in progress. as you can tell just from this picture, I still need a new mirror, (which I have fixed three times by now, FYI )  And all new leather for my seat. 


I covered The muffler with nothing other than a real large oven rag. 

Take the cap off the brake fluid reservoir, there is one for the rear brakes, and one for the front brakes. 


and then got to work.  Took the dust cover off

Took these little clips things out. 

Took the slider pins that hold the brake pads in place, and then the little clip spring for vibration reduction pops out and you have to find them on the floor.    Then slide out the other pin, and the brake pads come right out. 

This is one of the old brake pads.    This is ground down way way too far than it is supposed to be.   Never is it supposed to get down this far. 

Slide the other brake pad out


These are the new brake pads I got on Amazon.com for pretty cheap, and some brake lubricant


I tried for about 45 minutes trying to get the caliper to loosen up so that I could get the new brake pads to fit, but no luck.  So i had to figure out how to take the whole caliper off and had to clean it in my sink and then got it to retract so I could fit the new pads. 


So I take the caliper off...


uhh yeah,  its night-time by now.  and This is me putting everything back together. 


My wife got home and brought me brake fluid from an auto parts store, because I had to flush all of my old stuff out when I had to take the caliper off. 
 AND>>>>>>>>>>   I'm finished.  Lets hope It works in the morning when I have to get to work. (of course after I bled the brakes, and cleaned everything up.

Coming soon on the bike project, is new leather for my seat. 
***update  Pleather is now installed on seat, see here ****


Tuesday, July 24, 2012

Why do Fries taste so good?!?!?

Often wondered by myself, and probably many others, is Why do french fries taste so good?     so after some studying up, I found some answers...

So basically one night, I just felt like splurging on my diet, and we went and got a Large Wendy's Fries, a frosty each, and also a Big soda each. Well, I pretty much never do this, but i just needed something that tasted really good, so i tried to get all that i could find that i liked.  The only thing that I could have added was some Oreos.

So after some research I found some history of French Fries, and why they taste so good.

Earlier, most restaurants used a mix of Animal fat (usually from Beef), lard, and oil.

Nowadays, instead of using animal fat Companies now have added hydrogen to vegetable oil to extend the shelf life, while the oil is being used to fry.

So they got rid of Saturated fat, which everyone thought was so SO bad for you, and started to eat trans fat instead.  Little did they know Trans Fat is even worse, and that is what is still used today in restaurants fryers.   Even something says "NO TRANS FAT", they according to the FDA, don't have to put it on there if it is less than one gram, or if they didn't actually add it in.   But in the frying process, at such a high Temperature it turns the oil into trans fat.

TRANS FAT,  why it is so bad, as it is explained in at least one theory, is that humans contain the Lipase enzyme, but that enzyme can only breakdown "cis" fats, so basically Humans cant even digest it.

The list of things for how bad trans fat are have been linked to, but not limited to:

  • Coronary Heart Disease
  • Alzheimer's
  • Cancer
  • Diabetes
  • Obesity
  • Liver Dysfunction
  • Infertility 
  • Clinical Depression
                                             (source: Wikipedia)

But that still doesn't explain why IT TASTES SO GOOD!!!
Basically your body sees it almost as a good fat (cis), but its really not,  its kinda like comparing the wolf in sheep's clothing analogy. Its so close, that your mouth doesn't see the difference, but the rest of your body sees the wolf for what it really is.
According to my understanding Trans fat also binds itself to other fat cells, rendering those fat cells also useless, as they will never be able to be used as energy for the body, which is what they were meant to do.

So in essence the more that fries taste good to you, its really your body just screaming out for Healthy Fats because you have not had enough lately and its thinking that it is getting just what it needed.

Next Coming up:
  Why Saturated Fat is Needed in your body and Actually good for you (something your doctor will never tell you)

Friday, July 20, 2012

How (Not) to change a tire.

I have changed many tires, and spare tires in my days, but this time it was way different.

Well, I went to go and put a spare on my Ford Explorer, and it had been flat for quite some time.

  So I got my Jack out of the back, and used one of my 5 spare tires.... Its kind of a long story how I ended up with 4 extra spares in the back but anyways.  I chose the spare with the best tread on it, and got to work. Using Pandora on my recently fixed Atrix 2, fyi.  

Basically I tried 4 different positions with the Jack , and I'm not sure what I was doing wrong, or did wrong, besides the Fact that I was trying to change the tire while on a rocky dirt surface.

Nothing was working.   Oh and every time I went to put the jack in a different spot, I had to use a couple of other spare tires as my "Jack Stands" to hold the car up.  

I finally went and read the instructions of where exactly to put the Jack, and I did that, but still couldn't get it high enough.

So I figured I could make the car go HIGHER, or make the ground go LOWER.  So I chose the harder of the two of course, and started digging out under the car...

After plenty of digging for about 15 minutes in way rocky soil, I finally got it deep enough to put the new tire on.  

So basically the Moral of this Post is that when you think you cant get something to work, THINK OUTSIDE THE BOX!!!  Either that or read the directions, but that's pretty hard to do sometimes.

-ACS

Monday, July 16, 2012

TV Wall Mount. PART 1

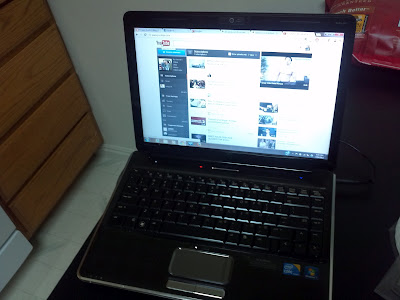
  So we got a TV with our target gift cards that we had from our wedding.   Its a nice 32" Apex LCD . Lately I have been using it as a double screen for my laptop.   I love this, as I can be on Facebook, and watch a YouTube video about something funny, or researching something.
  Today, I decided to surprise my wife for our two month anniversary, and finally mount our TV to the wall.


This is What it looked like before.  Part bookcase, part tv stand, part everything
apex, 32", LCD, TV, dresser, messy, cable, HDMI

 Not to mention the jumbled mess of wires
apex, 32", LCD, TV, dresser, messy, cable, HDMI, wires, RCA

This is where the TV stand needs to go, so it can hide all of this, the internet, WiFi and cable stuff. 
cable, internet, comcast, wifi, tv,

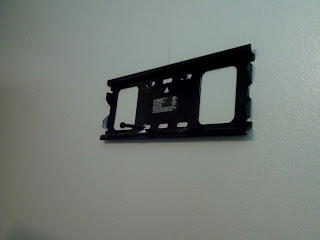
 So I had to mount these on the TV using the new mount after my second trip to Target. (The first trip I grabbed the wrong mount, and it said it would fit a 32" TV, but the mounts on my TV were larger than usual.)
The Mounts ended up being 400mm X 200 mm. 
apex, 32", LCD, TV, dresser, messy, cable, HDMI, wall, mount
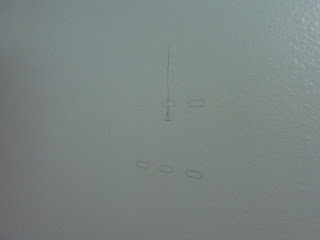
 So i measured on the wall exactly where I wanted it to go.
apex, 32", LCD, TV, dresser, messy, cable, HDMI pencil, drawing

Drew it with a pencil
holes, pencil, drawing, white, mounting

And then forced the screws into the stud by hand, cause I couldn't find my hand drill.  But it all came out fine in the end.  The mount was rated for 80 lbs, and my TV is only 17.3 lbs. 
screws, bolts, tv mount, tv apex, drywall, pencil

This is the one I ended up getting.   About 50 dollars or so.
apex, 32", LCD, TV, dresser, messy, cable, HDMI, target,


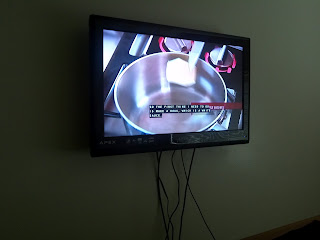
And it took me a little longer than I thought, so with the help of my wife, since she had gotten home by this point, we were able to put the TV up together, and made sure everything works, and IT DID!!!!
working, wall, mount, tv, apex, 32" HDMI

And this is the finished product, for today at least.  I still need to set up the front room, and find somewhere to put the cable box, and DVD player, but its a work in progress, and that's why this is just PART 1.
wire ties, apex 32", LCD, tv,

So after I figured out which mount I actually had to purchase, This project only took me about 30 minutes, which included the time moving stuff around. 


---Coming soon--- Hopefully, home-made surround sound?  sounds good to me. 
-ACS

Saturday, July 14, 2012

Broken cell phone screen, fixed. Way easy. Motorola Atrix 2 .

Remember back when you were a kid, and you took things apart to try to fix them, but then could never get them back together?
Well when we were coming back from vacation last week, I was getting the keys out of my pocket, and had a lot of things in my hand, and my Motorola Atrix 2 smartphone dropped on the ground and the screen cracked.  I was so mad, as it was on the 4th of July, we had just been driving all day and I didn't want to have to buy a new phone.....
   So... after some searching youtube for how to replace just the screen (which i came to find out is called the Digitizer, and not actually the LCD screen),  I ordered the parts on Amazon for about 53 dollars for everything i needed.
  The parts finally came yesterday and so i decided to post how easy it was to replace it.

Oh and the Youtube video I used was this one.

Well here it goes,  here is how my phone looked after it got cracked...
att, motorola, atrix 2, broken, dropped,


So I got all the necessary tools, and got to work. 
laptop, youtube, computer
 The white roll is the tape used to put the new screen on, the new screen and then those tools only cost me like $1.50. 
Motorola, Atrix 2, t5 screwdriver, pry tool, 3m tape, digitizer, screen, LCD, Amazon.com
Cant forget snacks!!!
snacks, kettle corn, popcorn, indiana, sweet, salty, sugar


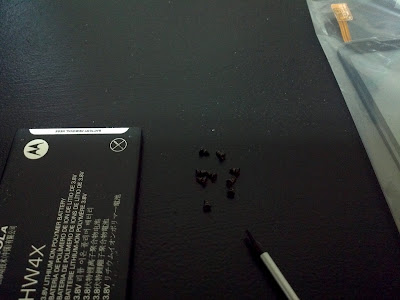
 You can see it was pretty bad covering about half of the screen.     So i started by taking the back cover off, the battery, the SIM card, and the memory card out. 
sim card, sim, att, sd, sd card, 16gb, motorola, atrix 2,


There were 9 little screws around the casing that I used the T5 screwdriver for.
t5 screws, t5 screwdriver
 Then I pried off the back casing with that blue tool, that I am going to call "The Magic Blue Wedge yourself in there tool"
motorola, atrix 2, motherboard, digitizer, screen.


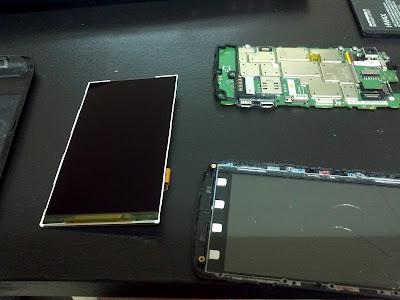
You then un-clip the three orange connectors.  1 for the motherboard main connector, one for the speaker and front camera, and another one for the Digitizer touch screen.   Then you lift out the motherboard which is removed in this picture. 
Screen removal, digitizer, removal, earpiece, atrix 2, motorola
 Unscrew 8 more little T5 screws to remove the metal casing holding the LCD screen in place
t5 screws, t5 screwdriver, LCD screen, digitizer
 Then lift out the metal casing, and the LCD screen can come right on out. 
LCD, digitizer, removal, scratched, motorola, atrix 2, cracked
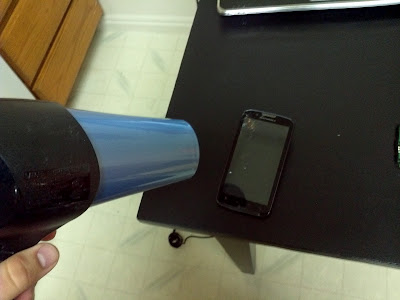
 The old Digitizer screen is glued down to the old casing so i have to heat it up with a hairdryer to make it pliable and able to wedge out of there using "The Magic Blue Wedge yourself in there Tool"
Hairdryer, glue, removal, cracked, motorola, atrix 2, digitizer
 After some coercion and snacks, I got it to come off.
digitizer, screen, removal, casing, atrix 2, motorola
 It left quite a bit of residue behind, as maybe i didn't get it hot enough, but as you can see in the picture i have scraped the right side, and still have the left side to do. 
casing, motorola, atrix 2,
 After about hundreds (it seemed like) pieces of this really thin adhesive double sided tape, and making each part double thick, i got enough on there. 
Tape, digitizer, atrix 2, motorola, cracked, screen, repair
 Then you just feed the New digitizer connector through the little slit in the casing, and press firmly to get the tape to stick. 
glued, atrix 2, screen, casing
 AND>>>>  back together it went.   I tried replaying the video backwards, and kept having to replay parts of the video and do it in reverse to make sure i didnt forget anything.
atrix 2, motorola, digitizer, motherboard, LCD, replacement
 Most of it back together.....  and
atrix 2, repair
 Viola,   SHE LIVES!!!!!
atrix 2, startup, motorola, android, processor
 and its all put back together and runs great.   It took a little bit longer to boot up, since everything had become disconnected, but still it only took about 45 second, when the usual is about 25 seconds.
boot, startup, atrix 2, finished, broken, screen, att, motorola

Moral of the story>>>>>>>>>>>   Fix your own stuff.  Youtube has a video for about anything, and parts online are really cheap also.   Cost to replace my phone for a new one =$390 .   Cost to replace screen with the necessary tools= $53 ( plus the cost of snacks hahaha)
Any questions, or have something broke yourself?  Let me see if I can help you.

-ACS

The Beginning of something big...

Basically I wanted to start a blog, as kind of a journal of my findings and research, but also on my projects and experimentation.   Coming up on the menu will be....

  • Raspberry Ketones
  • Arduino circuit board Programming.
  • Posts of my current supplements. 
  • Fat loss ideas and Diet
  • Alternative fuels in cars and motorcycles, and powering homes.
  • Solar power possibilities
  • ....and many more to come    :)