Monday, August 27, 2012

Clutch pushrod broke? I didn't even know what that was until I fixed it

Well this here is the part that was really broken, when I thought my clutch cable had snapped.  Really this little part had snapped in two, and I have no idea how it happened either.  Online most of the places I found that talk about this say it happened because someones chain got old and the chained snapped while driving, or the other option is that someone was doing a wheelie and came down way too hard, and it put too much pressure on it, and it just snaps. 

This is the new part I got from Ebay, Used, for about 30 bucks. 

katana, 750, clutch, pushrod, 1994


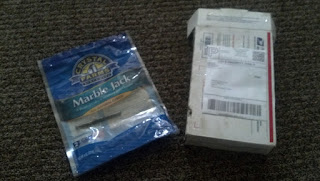
And surprisingly this is actually how it came. In a used shredded cheese bag, with some cheese still left in it, all in a box.    Kinda.... awkward...
Marble Jack, Shredded, Cheese, Ebay, Paypal


So when I first started this project
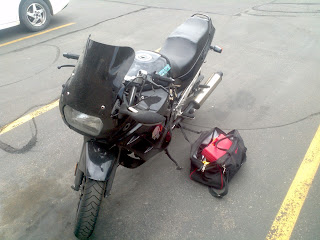
tools, katana 750, black

Unscrewing and take off all the plastic ferrings, and the mirrors (I needed to replace the mirrors anyways, so I got new ones that I will put on later)

And everything is off, and its a pretty naked bike
naked, bike, suzuki, katana

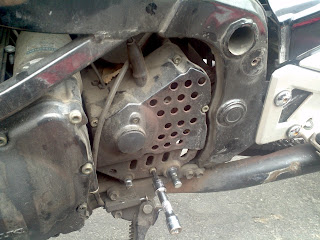
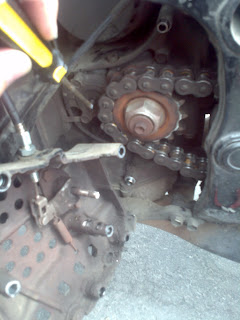
And this is where the fun begins, I had to take this casing off of the clutch. It is also where the clutch cable was attached to.
clutch housing, casing, clutch, screws, katana 750

But as I took it off I realized the Clutch Cable was fine, and this random part was broken instead, which I didn't even know what it was. 
Broken clutch pushrod, suzuki, katana

If you couldn't see it, The screwdriver is pointing right to one end, and the casing still has the other end. But if you refer to the very first picture in this post, It is all supposed to be one piece. So I had it ordered, and then replaced It, and put everything back together backwards the way it came. 
clutch pushrod, suzuki

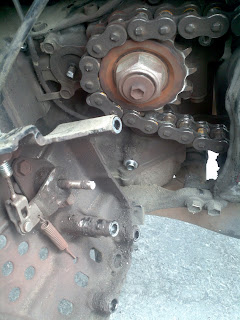
The hardest part of the whole thing was re-adjusting the clutch cable so it was back to normal. It is SO SO temperamental  and seemed like it had to be in exactly the right spot.  That's what that cable and nuts are at the top of this picture.  It took forever, and it killed my battery, so I had to jump start it with my wife's car. 
Clutch cable, adjustment, katana, 750


I also bought brand new chrome mirrors, that looked pretty good on the bike also, but still have to put the plastics back on, and that's why there is no picture for now. 

Tuesday, August 21, 2012

Xpand 2x review Caffeine-free

This is my review of The brand Spanking new Dymatize product: Xpand 2x caffeine-free Mandarin Orange Pre-workout drink. 
First off this packaging is way smaller than the original Xpand, But I like the flavor a lot better.  They happened to sweeten it with Stevia, an all natural sweetener that is technically an herb, (but the FDA doesn't let anybody call it a sweetener.) BUT they still put Sucralose in it, which I will be calling the company about soon enough to find out why.  Sucralose is a sweetener that kills all your good bacteria in your gut, and makes it so you don't digest very well at all. 

Dymatize, Xpand 2x, Xpand, xpand 2x, Caffeine-free, stim-free, no stimulant preworkout

This being a caffeine free pre-workout, it didn't give quite the "buzz" high amounts of caffeine give during a workout. But this time I'm going caffeine free. It took a few days to see the real results. supplement facts, no caffeine, agmatine sulfate, creatinol-o-phosphate, rhodiola, creatine, stevia
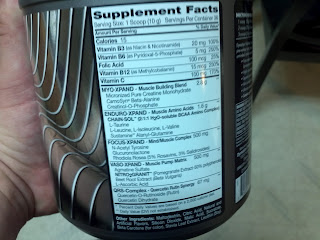
You cant really see the ingredients on mine, so I got this from the Source.  Dymatize's website
beet root, quercetin,  caffeine free, agmatine sulfate, xpand, xpand 2x, muscle


 The key ingredients in this formula is the Agmatine Sulfate which is one of, if not the best Nitric oxide supplement you can get. I also really like that this formula has the Creatinol-O-Phosphate (COP).  "COP" works by giving energy to tissues and muscle in your body that are de-oxygenated, or are in a very low oxygen environment. I have seen studies on Rhodiola where it has been shown to keep someone from feeling tired if they did not get enough sleep, and I have used it many times, and loved it. 

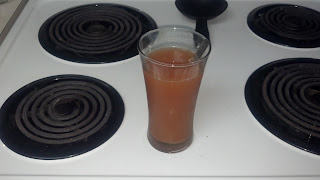
 It also doesn't really look that good when you mix it, but it mixed pretty well.  There were just a few little clumps in the bottom, but they would have gone away if I had mixed it with more water.
orange drink, cup and spoon, xpand 2x orange, xpand 2x, xpand, dymatize, water

The only reason why I had to wait a few days for this to really kick in , was because I was just coming off of caffeine.   I still have about 2 weeks left in this bottle, but I have a feeling I am going to like this.  

I will give an update when I am finished to give my final results and last thoughts on this product. 


Saturday, August 18, 2012

Make your own Chinese food made by an American, (just like Panda Express)

OK so this isn't going to exactly be Panda Express, but that's also because I didn't add very much bad stuff at all to this.   But it is so so good, and one of the only meals my wife has loved in the last little bit that is my own recipe.

Ramen, frying, fried, chicken, frozen, teriyaki, recipe


First you start off with some Frozen Chicken Breasts.
recipe, frozen, chicken, microwave, defrost, fry

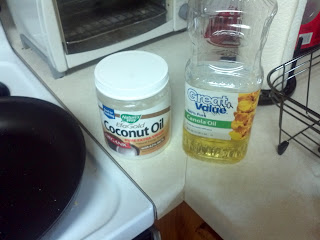
I then used a mix of mostly Coconut oil, and a little Canola oil.
Coconut oil, coconut, canola, oil, frying, oils, fats, good, bad, MCT's

About a tablespoon of coconut oil is all that is needed, which is loaded with healthy fats, and MCT's.
1 TBSP, tablespoon, coconut oil, oil, fats, frying

And then for my noodles of choice, I used the cheapest there is... Ramen noodles.

maruchan, ramen, noodles, chicken flavored, frying

Defrosted the Chicken in the microwave for 1 minute, and then sliced into medium sized chunks.

thawed, sliced, frozen, chicken, breasts


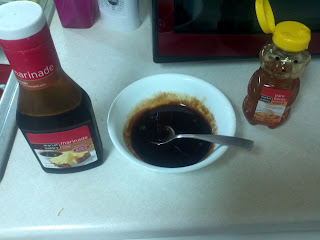
My special Sauce that I made was this Teriyaki Marinade with a couple tablespoons of water to Dilute it.

Wal-mart, Teriyaki, Honey, water, microwave, spoon, cook, recipe

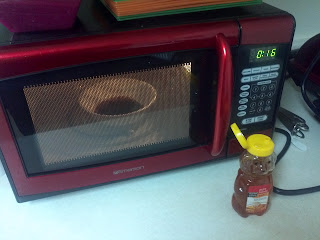
Warmed it in the microwave to make it so that the honey would dissolve without having to microwave the honey. (microwaving the honey would get rid of all the good stuff that is in honey).

teriyaki, honey, 30 seconds, yummy, sauce


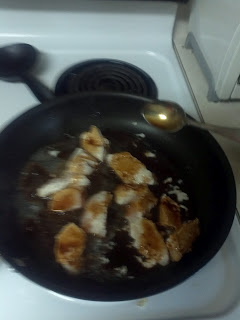
Start cooking the chicken, and then drizzle the "Honey Pineapple Teriyaki glaze" all over the chicken.

glaze, pineapple, teriyaki, frying, cooking, yummy, tasty, pan

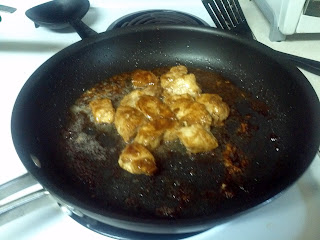
Cooking... cooking.... cooking....

cooking, sauce, glaze, spoon, really good, chicken, frying

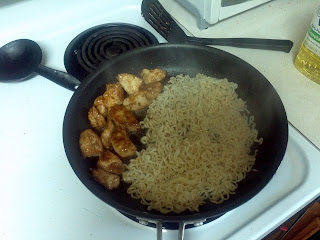
By this time I also started the Ramen noodles as they don't take long to cook at all.

multi-tasking, ramen, chicken, cooking, recipes, good recipes, yummy,

Added a little bit mote glaze

teriyaki, chicken, glazed, honey

Cooked until the water and glaze started to thin out.

honey-glazed, chicken, frying, recipes,

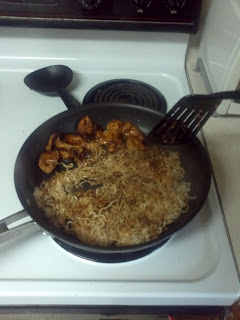
and added the noodles, with a little canola oil, to aid in making the noodles a little bit more crispy.

Dual-cooking, ramen, chicken, recipes

Flip the noodles a few times, while keeping the chicken on the pan to make the honey caramelize a little bit more.

Asian style, frying, fats, coconut, sweet, recipes

And the last touch is to add a little more honey, and let it caramelize a little more to add some more sweetness. And we are done!!!   Way good, Honey pineapple Teriyaki chicken.

honey, honey, honey, chicken, ramen, fryed, asian, chinese, recipes, recipe, yummy

I love this meal, and first started messing around with it before my mission.   I would probably add a little brown sugar and crushed garlic in the mix, and maybe a drop of Ginger oil to spice it up a bit also, but all is well, and its quite good.

Total cost for whole meal of used products,  less than $2.00,   Panda Express- $7.00


Thursday, August 16, 2012

Malia's New scooter: Part 2

Well today on my way home from work my clutch cable went out on my Suzuki Katana. (which no clutch is quite a ride, let me tell you).  So with that happening I decided I was going to have to fix her scooter a little faster than before expected, so that I could drive it until my new clutch cable comes in from Amazon.com.

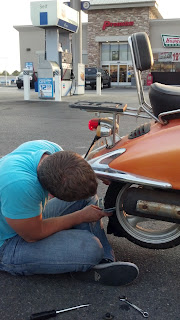
So after some Googling I found out what I would need to do to replace the tire valve.  So I drove the scooter to the nearest gas station with a flat tire on the back,  got halfway there and the front tire popped also.

But I still made it there safely.
Here is my cute wife, and her new scooter. :)
scooter, chinese, 150, 150cc, tire valve, broken


 And so I got the all the parts, new tire valves, and a big C-clamp to get the tire open enough to get the old tire valve out.
scooter, 150cc, tools, C-clamp, air, tire, valve, broken


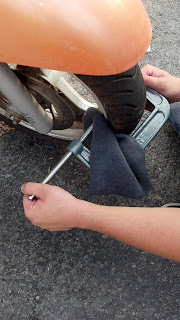
So I attached the C-clamp on the left side to the rim, and the right side to the tire to pry back the bead.   I pry back the tire to gain access to the old valve that I have to take off from the inside. 
c, clamp, C-clamp, scooter, replace, tire, valve


I used a hat, to protect the rim from damage. 
hat, repair, scooter, tire, valve

Austin Springer, scooter, Tire, valve


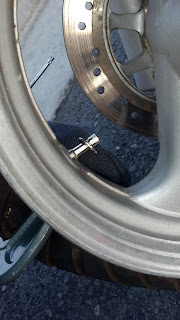
The C-Clamp almost pulled the tire back far enough to pull out the old valve, so I got screwdriver and pried it out anyways, but I couldn't fit the new one back in until I pulled it back farther
tire, clamp, rubber, 150, valve


This is with the new valve back in,   BTW i did the front tire first and then the back tire.   I bought the screw on valves, as they seemed easier to work with rather than pull through kind that it first came with. 
screw, on, tire, valve, gy6, scooter

gy6, scooter, tire, valve, replacement


Done with the front, so I moved onto the back tire. 
tire, valve, front, orange, scooter

Austin Springer, Austin, rear, tire, scooter, 150cc,

Austin Springer, Austin, Springer


and after we went to the second gas station, because the first one's air machine didn't fit the new rear valve, we completed it all, and its pretty much ready to roll.   Which is a good thing because I will have to make it to work on this for the next few days. 
Malia, scooter, finished, valve, replacement

Monday, August 6, 2012

Malia's New Scooter: Part 1

Well this my next project.  Getting this for one hundred dollars, it still needs some work, but after sitting for two years its surprisingly in pretty good condition. 

orange, scooter, 150cc, broken
Malia has been begging me to let her drive a scooter, and so as my sister Candace and her girlfriend, Mo, decided to move to Denver, they would be needing to leave this behind. So I will be fixing this up for Malia.

Its a 150cc scooter, which I'm pretty sure is Chinese built and has the same motor that the scooter i had in high school had.

Today so far, I got a sweet deal on a new battery from a friend I knew from High School. and installed it.
Started up after only a few seconds surprisingly, after the new battery install.

The tires were way low and so I drove it to the gas station only a couple blocks away from Candace's place.  Turns out that the front tire is fine, but the Rubber Boot on the air valve on the back tire is ripped, so I will need to install a new one.  No time tonight left to start a several hour project, So I will plan on doing that in a few days.

So part one is finished, but Malia will be way excited for when this is ready for her soon!!!

-ACS

Wednesday, August 1, 2012

How to reupholster motorcycle seat.

And here is my little project for the day!!!

suzuki, katana 750, new seatAfter

old, seat, suzuki, katana, 750, Before


Well, the seat was looking pretty shabby....but the finished product actually looks pretty good. Better than when I got the Bike.

And HERE is how I did it.

Well first off, I started by going to Jo-Ann's fabric store and look for the right fabric.   There weren't actually many choices , so the choice became very easy.  I heard that I needed to use fabric glue to first attach the fabric on, but that didn't end up working in the end.
Then I stopped by Walmart and got a Staple Gun and staples.   All of these cost me just over twenty dollars.
under, 20 dollars, walmart, Joann's pleather, glue, staples, staple gun,


I got the cheapest staple Gun they had, but kinda wish I would have gotten a better one, except this is the only project I could think of that I would ever use this for.

So I laid it out, after putting down some of the fabric glue to get it to stick a little bit more in the right places.
katana, 750, seat, reupholster,

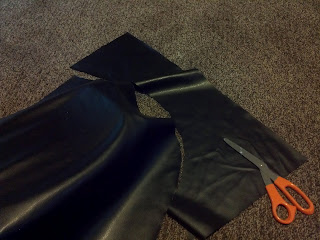
 The Pleather all laid out in the right spot
fabric, pleather,

 Then I cut off the majority of the excess fabric just so that it was easier to work with. 
scissors, fabric, katana, seat

Starting stapling, while figuring how to pull it in the right places to not move it too much out of position, and trying to make sure there were no ugly folds on the sides. 
stapling, seat, katana, 750, suzuki


Continued Stapling....
seat, stapling


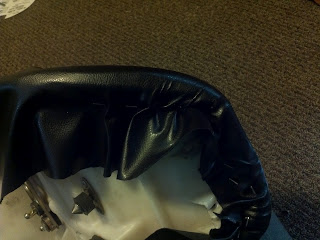
Now I'm getting to the hard part, where the seat goes down to the part where the driver actually sits.
stretching, pleather


And this is where the folding kept happening, and it was quite hard to figure this part out, but after enough stretching and stapling, and the undoing staples and re-stapling, I figured out how to make it so there were no fold in the fabric. 
stretching, pleather,  suzuki, motorcycle

I found an extra rag (that hopefully my wife doesn't notice is missing, i only used it cause there was only one in this color anyways) and cut it around the edge where some of the foam was missing. and then put the fabric over this and stapled it closed.
After I was done with all the minor adjustments, I the had a lot of extra fabric still on the bottom, so I cut that off

motorcycle, reupholster, how-to,

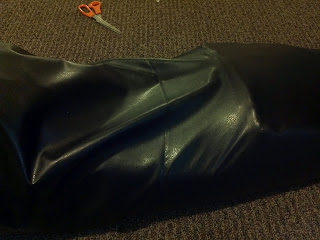
 Almost finished.....
seat, repair, leather, pleather
 More Cutting...
cutting, excess, pleather
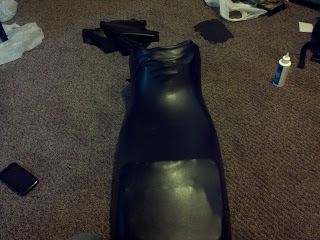
 and viola,  It worked.

right side, katana, 750, suzuki

So basically if I were to do this all again,
  •  I wouldn't have bought the glue, 
  • I would have bought a little stronger staple gun, 
  • Tried to find a little bit thicker fabric Pleather, as I'm not sure if this will last more than a couple of years. 
Thanks for reading.
-ACS